
This post is for you who are curious: how to build a house made of straw bales and adobe, and how can it stand and last? Well, I’ve got the chance to try this summer and wanted to share this experience in natural building with you.
In August I went a bit quiet on social medias, and for a good reason. I was in the countryside of England, half way between London and Brighton, camping on the site of Oakland Farm for 2 weeks. This is where I was learning to build houses from natural materials with Paulina and Anthony of EarthHandsandHouses (fb: http://www.facebook.com/earthhandsandhouses). We were among a group of roughly 40 other people from very diverse countries and social backgrounds. We all had in common a sheer enthusiasm to the idea of building our own nest, as well as en ecological and societal awareness. It seems obvious that the lifestyle and society that we currently live in cannot last, and so we were all here to both learn and find solutions to this matter of living more in harmony with our environment and mother Earth.
Here I would like to highlight the process of building this structure from straw bales and cob, which is what we did during the second week of workshops. I hope you’ll enjoy this short guide; of course, I wouldn’t advise you to do it yourself without first taking a course with Earthhandshomes, or from people with a good training.
The first step is to build the wood frame that will support the roof. You basically have 3 options when building a straw bale/cob building. It can either be a load bearing structure, which means that the walls will carry the weight of the roof. It can otherwise be a beam and pole structure, that carries the roof on the wood frame; or it can be an hybrid system, with the poles carrying the roof and the straw bales filling the gaps between the poles. Here we went for this option.

The timber wood frame to support the roof.
The structure made of 6 poles and a frame for the roof was built before the group arrived for the workshops. At the bottom of each pole you’ll find tires filled with concrete. While we aim at not using much of those modern materials in natural buildings, we do so when it makes sense (time and cost wise) for the overall structure and in small quantities.
We then build the rest of the foundation by digging a trench following the roof frame. The depth of foundations depends of different factors, such as the overall weight of the building, how large the foundations are and the frost limit in the soil in winter time. So it can get quite technical! Here we were building a large tool shed/cabin as an exercise and therefore didn’t need to go very deep.
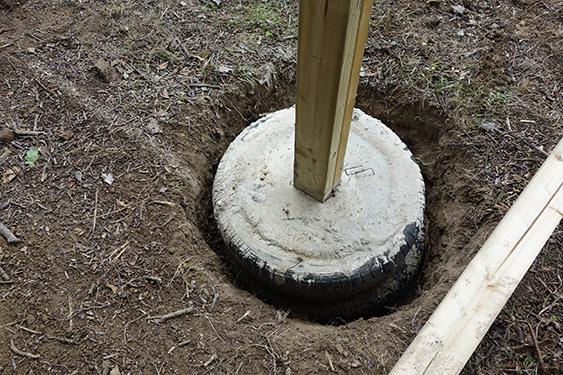
Concrete into tires for the pole foundation.
The foundations were done with the earth bag technique. The earth bag principle was first designed by Nasser Khalili of the Cal Earth institute. It is basically rammed earth but the earth is first put into polypropylene Bags. Before we put the bags, we inserted some ropes in plastic pipes sections and put those at a regular spacing on the floor, where the foundation will be. Why? Those ropes will actually be used for compressing the straw bale walls later on. They need to be in the pipes to be able to slide easily and not be crushed by the foundations.
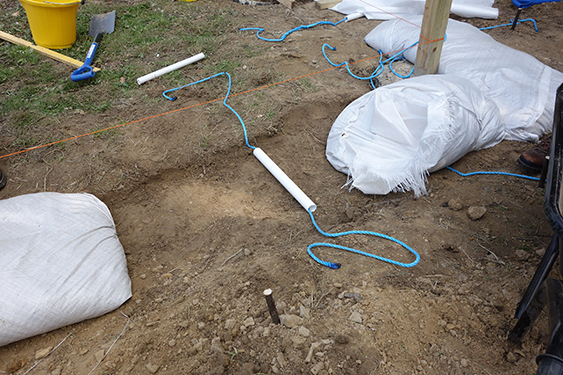
Earthbags foundations with the ropes under the bags.
Those bags are then stacked on top of each other tightly. It is especially important to be sure that the corners of each bag are wrapped well and neatly against the next bag. We then tamped the content of each bag and make sure every pile was leveled properly.
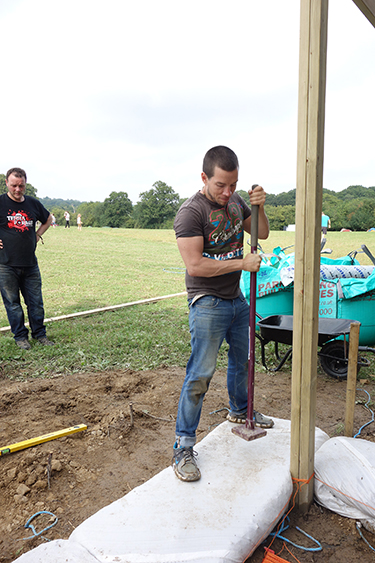
Your favorite Feng Shui guy tamping the earthbag.
We did two layers of earth and a third row on top filled with washed stones – this is to prevent the humidity from rising up to the walls. The stones need to be washed gravel, as unwashed will actually help with humidity raising through the earth that would still be on the gravels. Once done, the bags are then nailed to each other with some wood pegs, a technique designed by Paulina. Alternatively, you can use some barbwire, which is what they do at Cal-Earth. The earth bag technique can be used to build large structures such as earth bags domes, and can even be reinforced by concrete if needed.
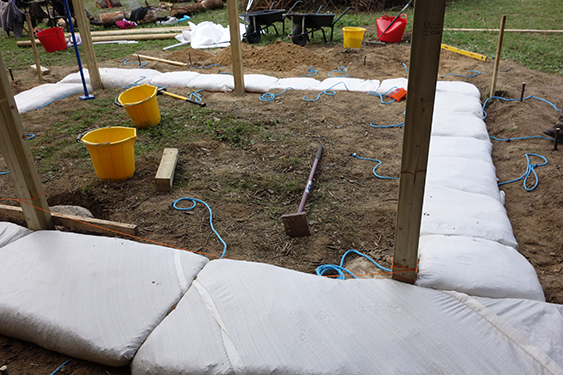
The layer of earthbags for the foundations.
After we laid the foundations, it was time to do the walls. Those are made of straw bales! First, we need to be sure the bales are really dry inside, as the humidity would otherwise start to rot the bales inside the walls. This is evaluated by lifting the bales – if they are too heavy, they are wet – and also by checking that not rotten, black straw is found inside.
We also needed to measure the bales! They are actually often of different sizes so you can have surprises with the finished wall at the top level if you don’t pay attention to this matter early on. Basically, we use the bales like giant floppy bricks that you stack on top of each other. You have to make sure that the joins are not aligned on top of each other, exactly like with bricks.
A wall in the making with straw bales.
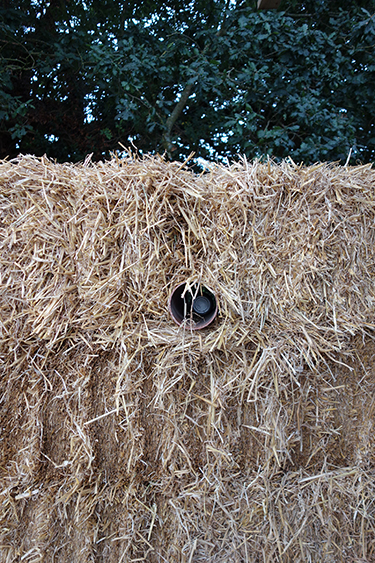
We also put some pipes inside the walls for good aeration. We also paid attention to the corners that must be especially strong and sturdy. Like with the earth bags, we then peg the bales with long sticks to give more solidity in the walls.
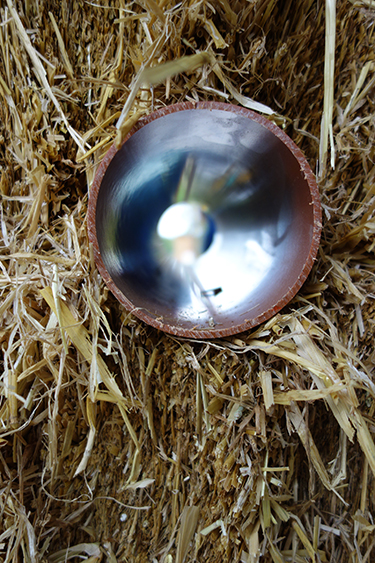
Pipe inserted into the strawbales wall.
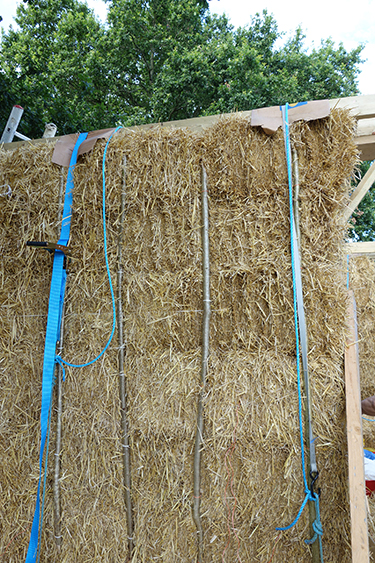
Then came the time to straighten the walls and give them a stronger frame. This is done with long sticks that form like a “basket” structure on each side of the bales. We used a string attached to one stick, then put it on the side of a bales wall; we then used a bale needle to go through the bale and someone else on the other side of the bale took it out, wrapped the string around another similar stick on their side and reversed the process. Once the strings are tightly attached all along the sticks, we have a solid “basket” the give more integrity to the overall structure.
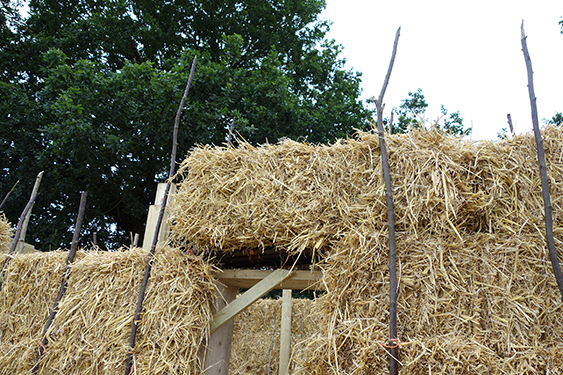
Stick to hold the straw bales walls.
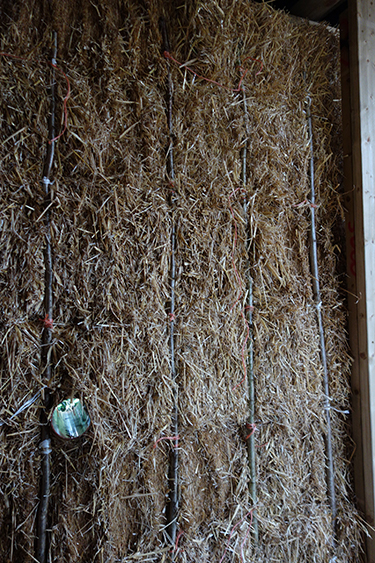
The finished wall with sticks on both sides.
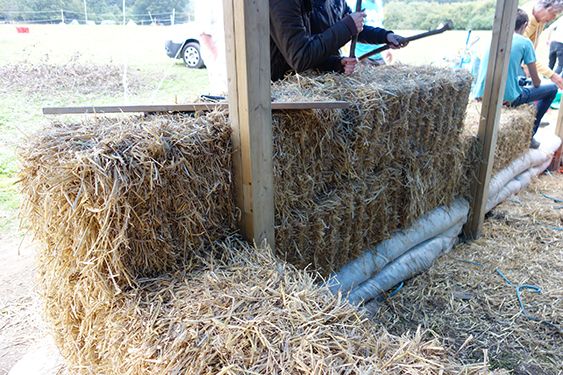
Then comes the time to build the wall frame. It is basically a wooden piece that follows the wall structure on its top. There are measurements and calculations involved to be sure it goes in the middle of each top straw bale rather than on their edges, and also to make the corners joins very solid. Once it is positioned, this is where those ropes that we put through the foundations come as handy. They basically are used to either be attached to ratchets or to other ropes that will go on top of the walls and then come back on the other side.
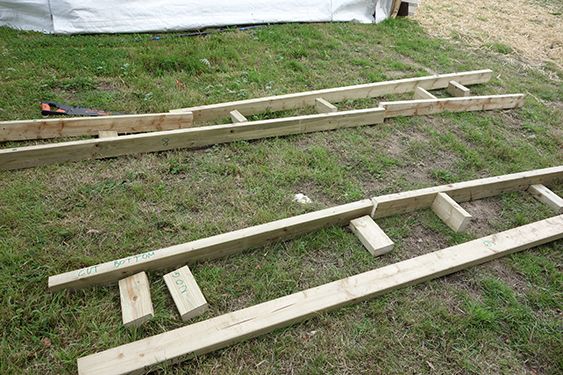
Building the wall frame
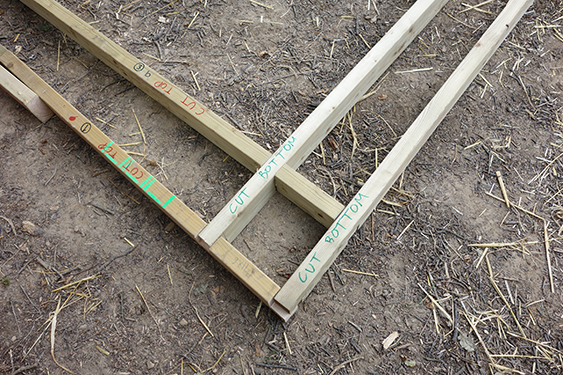
Assembling the wall frame.
The next phase is to really fill the joins with a mix of straw and mud; it is a sort of cob, but there is much more straw in it and less of the earth mix. We stuffed this mix in every join and afterward it looks like a brick and mortar type of building,
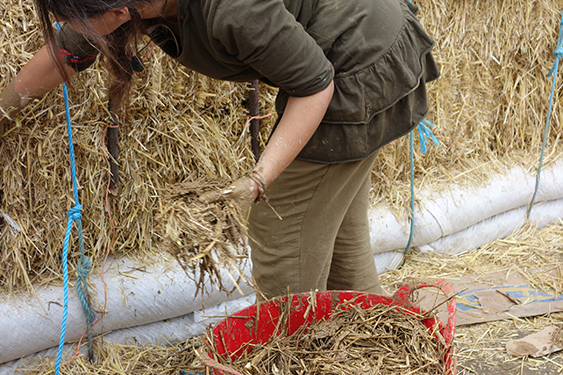
Filling the joins of the bales with cob.
Once this is in place, time for the compression. We all work in harmony on ratchets and ropes to compress the building as much as possible. It is not a long process but need to be coordinated carefully, as you want the whole structure to remain leveled. If one wall is compressed too fast or more than another one, then the whole building is wobbly and going sideways. Even in natural building, you need a regular structure to start with!
Strawbales walls compressed with the ropes and ratchet.
Here is the building after compression. We removed the ratchets and put the permanent ropes that will stay in place, compressing each wall, where the ratchets were. Time for cobing the whole walls then!
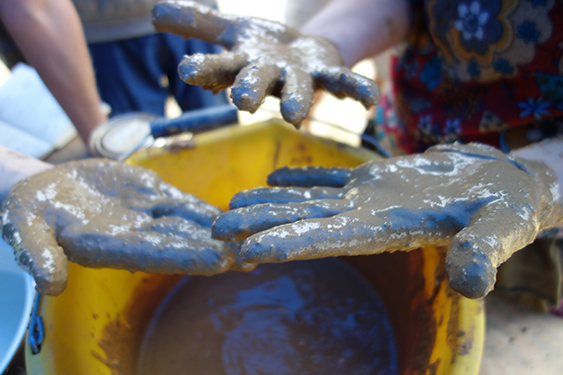
Before we could use cob, we had to prepare it. And that was such a fun part! The mud pool was great fun. It was made of straw bales covered with a large plastic sheet, then filled with sifted earth mixed with water. Once the slurry got the right consistency (best is to soak it overnight if possible), we then added straw to the mix to produce a large amount of cob. You can see in the pics that the process got a bit messy but we all had great fun with it. We all wanted excuses to go in the mud pool to be honest…Of course we first had to dig the earth and this was a very physical part and not that fun actually.

Covering the walls with cob.
We sometimes made new friends in the process, as you can see with this little lizard that I excavated.
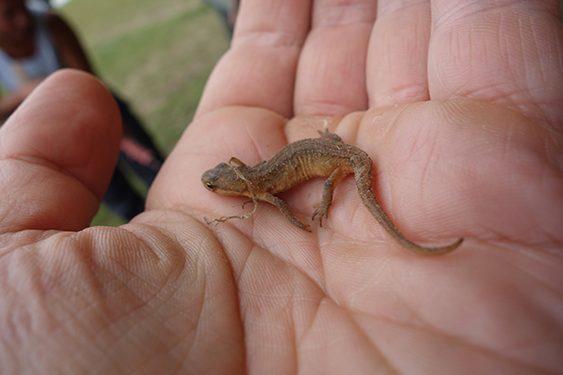
A little friend that I dug up on the site.
Cobing is really a fun part as it is mostly done by throwing balls of muddy straw mix on walls and then dipping our fingers in so they stick to the bale. If you pat them on, they tend to fall, so this is to be avoided. Cobbing a whole wall and making it straight can take a long time but as we were a lot of people on this workshop we manage to get the work done in two days.
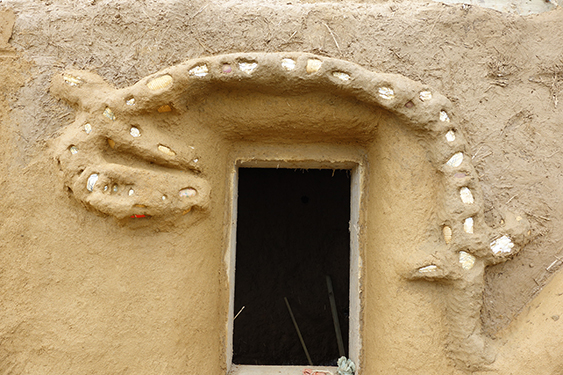
Once the cob is dry-ish (ish is a suffix we use a lot in natural building workshops…) we then were able to start the sculpting process. Those homes and building are called “hand sculpted” for a reason and this is exactly what we did next. I decided to go for a Dragon that guarded on the window frame and sculpted it out of cob supported by pegs, and decorated with pieces of vases and tiles. Breaking those items beforehand was also a lot of fun too!

Dragon made of cob, guarding the window.
Finally there was the plastering on top of our creations. This was achieved through a mix of clay, sand and wheat paste in water. We had to taste different ratio of sand to clay (3:1 worked best) to get a desirable plaster.
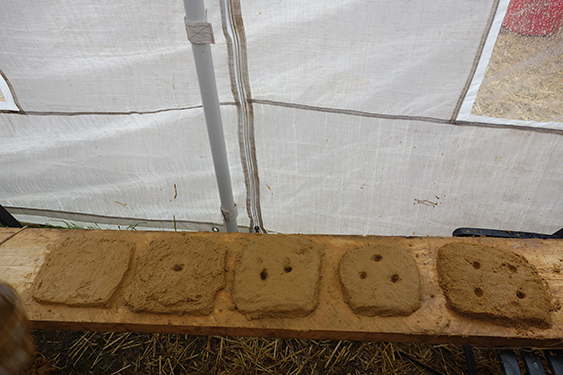
Testing the different proportions of sand to earth.
We then applied it on most of the building.
Natural sandy plaster put on the cob walls.
On the last day we were introduced to a fairly similar mix but this time to make some natural paints. The great advantage of those natural paints is that you can paint over walls that have already being covered with the toxic paints full of VOC and trap some of those with the new layer…
Natural paint made of sand, earth and wheat paste.
The whole workshop was fantastic: our teachers were very knowledgeable, the group synergy amazing, and the evening talks of great interest. I did a presentation on planning floor plans and design with Feng Shui that captivated my audience. Most people didn’t realise that the best Feng Shui is implemented when designing the plans, in regard to the natural site chosen. Feng Shui and natural building are to be me a very organic pairing, and if you are involved with natural construction, please do get in touch so we can explore the possibilities of evolving together. If you are planning on building your natural home, then contact me to implement Feng Shui in your design early on.
Going back to civilization and my laptop was very odd. There is something very sensual and primal into mixing and touching earth, and it easy to get hooked. I am already looking forward to my next workshop and to see where it all takes me. My journey in natural buildings is only starting and I hope you’ll follow me in this quest for a more ethical, natural and sustainable lifestyle!

The finished natural tool shed, minus the roof.